1.

2.

3.

4.

5.

6.

1 Dec
The below videos are simulation of RGB and Depth data taken by Microsoft Kinect Sensor.
Kinect sensor equipped with RGB Camera, 3D Depth Sensors, Motorized Tilt and Multi-Array mic. (picture taken from Wikipedia)

In this experiment, left screen is a display of color image and right screen is a display of 3D depth image taken by the IR (infrared) sensor.
Beberapa bulan lalu (kalo nggak salah November 2010), Microsoft mengeluarkan produk baru yg bisa dipakai sebagai sensor utk bermain video game X-Box tanpa memakai joystick. Nama sensor barunya adalah Microsoft Kinect Sensor. Dengan memakai Kinect, kita nggak perlu lagi bermain video game dengan joystick. Nah, sebagai gantinya, joystick-nya itu adalah semua anggota badan kita yg setiap ayunan tangan, gerakan kaki atau anggukan kepala akan ditangkap oleh si Kinect dan diubah menjadi data yg selanjutnya diproses oleh komputer menjadi sinyal-sinyal input joystick. Kalau kita lompat, maka karakter video game di layar pun akan ikutan melompat.
Alat ini dilengkapi dengan beberapa sensor, yaitu : Kamera RGB (Red-Green-Blue), ‘Depth sensor’ yg dilengkapi dengan pemancar&penangkap Infra Merah, Multi-Array Microphone.
Baru-baru ini saya iseng nyobain kinerja si Kinect di laboratorium kampus. Lumayan, nyobain “mainan” baru yg dibeliin sama sensei Lab. (mahal jg kalo mesti beli sendiri dari kantong pribadi). Ternyata seru juga loh!!
Coba deh lihat dua video di atas. Hehehe.. ada orang aneh gerak-gerak nggak jelas :D…
Layar terbagi menjadi dua bagian : layar sebelah kiri dan layar sebelah kanan. Nah, layar sebelah kiri memberikan output berupa gambar asli yg ditangkap oleh kamera (gambar merah-hijau-biru), sedangkan layar sebelah kanan memberikan informasi berupa jarak antara si “benda” terhadap kamera.
Kinect bisa memberikan prediksi jarak antara “benda” dengan kamera berkat adanya sinar infra merah yg ditembakkan ke arah benda, lalu terpantul kembali ke bagian penerima infra merah. Dari situ bisa dihitung waktu pantulan, dan komputer bisa memberikan perkiraan jarak. Setelah itu, “data jarak” diubah menjadi gradasi warna yg menunjukkan perbedaan jarak antara benda dengan kamera. Kalau diperhatikan dengan jeli, di layar sebelah kanan akan terlihat gradai warna oranye, kuning, hijau, biru dan hitam. Semakin dekat suatu benda dengan kamera, maka tampilan gradasi akan manjadi hitam.
Setelah percobaan ini selesai dan koding-nya udah mantap, saya punya rencana utk memasang si Kinect di robot MG10. Kayanya bakal seru nih,,, robot MG10 akan punya “mata” baru yg bisa melihat kondisi sekitar sekaligus memberikan prediksi jarak dengan objek di sekitarnya.
22 Nov
Tsukuba Challenge [ Real World Robot Challenge (RWRC) ] is a competition of autonomous mobile robot run in real environment (Tsukuba Center Park). The competition is not about how fast the robot can reach the goal, but how the robot can interact with surrounding environment.
Me and my Lab were joined the competition.
Team number 17.
Robot name = MG10
Gunma University feat Mitsuba, Inc.
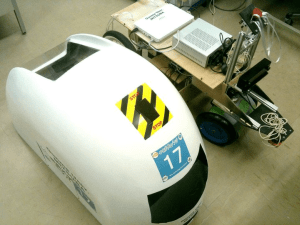
MG10. Intel inside! ^_^

Micro-controller, etc
Sensor :
– Stereo Camera (rgb image)
– Wheel encoder (odometry data)
– Laser Range Finder (obstacle detection)
Autonomous navigation system:
– SURF based image recognition
– HOUGH transform
– Line detection
– Sky detection
– Triangle detection
– Tile pattern recognition
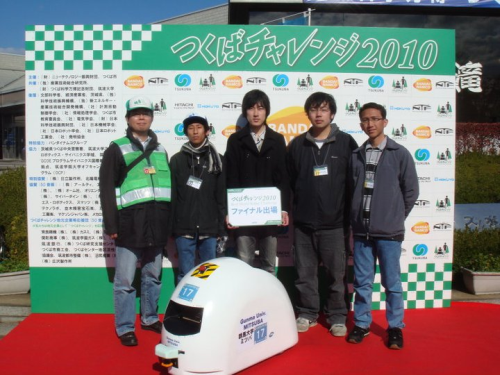
Project member :
-Shioya Toshiaki (Phd. student)
-Tsunoda Yuuki (Master student)
-Hirano Yuuta (Master student)
-Dzulfahmi (Bachelor student)
-Kodaira Hiroyuki (Bachelor student)
-Ohta Naoya (Professor)
And yup, I recorded the video when MG10 was in action. ^_^
First Day
Final Round
8 Nov
Here are the steps :
1. Compute the gray-scale and calculate the SURF features from the model image
2. Turn on the camera and get the real-time input image. Convert each frame to gray-scale
3. Compute the SURF features of the gray-scale camera frame
4. At this step, we want to compare between “model image” and “input image” (camera frame).
For all features of the model, for all features of the camera frame, determine if they represent the same point (calculation of their distance and thresholding) ;
5. Once we have obtained the pairs of associated points, we determine the homography matching all these pairs (using RANSAC or least median squares algorithm) ;
6. Drawing of the projection of the input frame in the illustration frame using this homography.
reference : http://wn.com/realtime_sift_tracking
Application in outdoor visual navigation:
22 Oct
Let’s try to detect corner from an image.
In this sample, I am using my own picture = building.jpg.
You can edit the below source code and try to detect corner from different image.
I am implementing two types of function to detect corner :
1. cvCornerMinEigenVal
The function cvCornerMinEigenVal is to calculate and store the minimal eigen value of derivative covariation matrix for every pixel, i.e. min(λ1, λ2) in terms of the previous function.
2. cvCornerHarris
Harris edge detector. You can refer to the original paper = A Combined Corner and Edge Detector
You may also refer to the next article : click here (Harris Corner Detection).
Source code :
#include <stdio.h>
#include <cv.h>
#include <highgui.h>

int main (void)
{
	int i, corner_count = 150;
	IplImage *dst_img1, *dst_img2, *src_img_gray;
	IplImage *eig_img, *temp_img;
	CvPoint2D32f *corners;

	//image file
	char imagePath[256] = "c:\\images\\building.jpg";
	printf("%s\n", imagePath);

	dst_img1 = cvLoadImage (imagePath, CV_LOAD_IMAGE_ANYCOLOR | CV_LOAD_IMAGE_ANYDEPTH);
	dst_img2 = cvCloneImage (dst_img1);
	src_img_gray = cvLoadImage (imagePath, CV_LOAD_IMAGE_GRAYSCALE);
	eig_img = cvCreateImage (cvGetSize (src_img_gray), IPL_DEPTH_32F, 1);
	temp_img = cvCreateImage (cvGetSize (src_img_gray), IPL_DEPTH_32F, 1);
	corners = (CvPoint2D32f *) cvAlloc (corner_count * sizeof (CvPoint2D32f));

	// (1)Corner detection using cvCornerMinEigenVal
	cvGoodFeaturesToTrack (src_img_gray, eig_img, temp_img, corners, &corner_count, 0.1, 15);
	cvFindCornerSubPix (src_img_gray, corners, corner_count,
					  cvSize (3, 3), cvSize (-1, -1), cvTermCriteria (CV_TERMCRIT_ITER | CV_TERMCRIT_EPS, 20, 0.03));
	// (2)Draw the detected corner
	for (i = 0; i < corner_count; i++)
	cvCircle (dst_img1, cvPointFrom32f (corners[i]), 3, CV_RGB (255, 0, 0), 2);

	//Message for debugging
	printf("MinEigenVal corner count = %d\n", corner_count);

	// (3)Corner detection using cvCornerHarris
	corner_count = 150;
	cvGoodFeaturesToTrack (src_img_gray, eig_img, temp_img, corners, &corner_count, 0.1, 15, NULL, 3, 1, 0.01);
	cvFindCornerSubPix (src_img_gray, corners, corner_count,
					  cvSize (3, 3), cvSize (-1, -1), cvTermCriteria (CV_TERMCRIT_ITER | CV_TERMCRIT_EPS, 20, 0.03));
	// (4)Draw the detected corner
	for (i = 0; i < corner_count; i++)
	cvCircle (dst_img2, cvPointFrom32f (corners[i]), 3, CV_RGB (0, 0, 255), 2);

	//Message for debugging
	printf("Harris corner count = %d\n", corner_count);

	// (5)Display the result
	cvNamedWindow ("EigenVal", CV_WINDOW_AUTOSIZE);
	cvShowImage ("EigenVal", dst_img1);
	cvNamedWindow ("Harris", CV_WINDOW_AUTOSIZE);
	cvShowImage ("Harris", dst_img2);
	cvWaitKey (0);

	cvDestroyWindow ("EigenVal");
	cvDestroyWindow ("Harris");
	cvReleaseImage (&dst_img1);
	cvReleaseImage (&dst_img2);
	cvReleaseImage (&eig_img);
	cvReleaseImage (&temp_img);
	cvReleaseImage (&src_img_gray);

	return 0;
}
Result :

4 Oct
Source code :
#include <stdio.h>
#include <dirent.h>

void main(void){

	//choose the folder path
	char DIRPATH[]="c:\\images\\";
	DIR *dir;
	struct dirent *entry;

	dir=opendir ( DIRPATH );

	//checking the folder content
	while ( NULL != ( entry = readdir ( dir ) ) ) {
		DIR *test;
		char filePath[260];
		sprintf ( filePath,"%s%s", DIRPATH, entry->d_name );
		errno=0;
		test=opendir ( filePath );

		if (test==NULL && errno!=0){
			printf("%s\n",entry->d_name);
                       // ... (your source code)
                       // ...
                       //...
		} else {
			closedir(test);
		}
	}
	closedir(dir);
}
Attention!! (Penting)
Ketika compiler gagal meng-compile kode dan keluar pemberitahuan error seperti berikut :
‘dirent.h’: No such file or directory
berarti dalam folder ‘include’ tidak terdapat header file bernama “dirent.h”
Please download the file from = http://www.softagalleria.net/download/dirent/
download file, unzip the package and copy the “dirent.h” to C:\Program Files\Microsoft Visual Studio 9.0\VC\include
Target file path bisa berbeda tergantung versi dari Visual Studio yang digunakan.
(Saya menggunakan Visual Studio 2008)
Selamat mencoba!

Recent Comments